
How to Print Exhibition Badges: A Comprehensive Guide to Professional Event Entry
First impressions matter. When an attendee arrives, their badge isn’t just a simple piece of ID—it’s their passport to networking, an extension of your brand's professionalism, and a vital data-tracking tool.
Getting the printing process right is the difference between a chaotic bottleneck at the front door and a seamless check-in that sets a positive tone for the entire event. Today's badges must do more than display a name; they need to accommodate scannable QR codes, distinguish attendee tiers, and even meet sustainability goals.
Whether you are hosting an intimate corporate seminar or a massive multi-day trade show, we have you covered. Here is everything you need to know about selecting, designing, and printing the perfect exhibition badges.
Pre-Printed Stock vs On-Site DIY
First things first, you need to decide how much of the "heavy lifting" you want to do yourself.
Option A: Pre-Printed Stock + Variable Overprinting
This is the "Gold Standard" and typically considered the best solution for exhibitions and events. You order badge stock from Badge Wave that is pre-printed with your high-resolution branding, sponsor logos, and background designs.
- The Tech: At Badge Wave, we use industrial-grade presses like the Bobst Mouvent LB 702-UV or the Konica Minolta Accuriolabel 230. These machines offer colour depth and crispness that desktop printers simply cannot match.
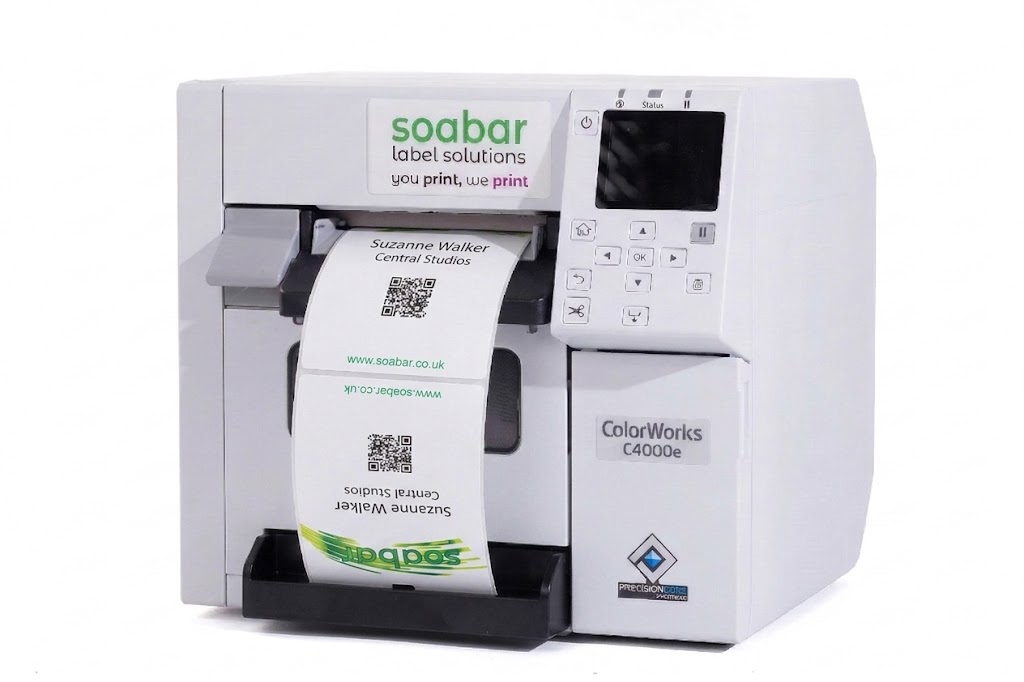
- On-Site: You then use a compact Direct Thermal or Inkjet badge printer (like a Zebra ZD621 or an Epson ColorWorks 4000e) to overprint only the variable data: names, companies, and barcodes.
- Why choose this? It saves time on-site, reduces ink costs, and ensures your brand colours look perfect.
Option B: Printing from Blank Stock
You buy plain white badge stock and print the entire design—logos and all—on-site.
- The Tech: You will need a high-quality inkjet printer to handle the colour graphics.
- Why choose this? It offers maximum flexibility if your branding or sponsors change at the very last minute. However, be prepared for slower print times and higher ink consumption during the event.
Choosing Your Material: Card vs Self-Adhesive
The "feel" of the badge contributes to the attendee experience. Here’s how to choose:
| Material Type | Best For... | Pros | Cons |
| Card (Single or Double Sided) | Multi-day conferences and more premium exhibitions. | Professional feel; very durable; easy to recycle. | Requires a lanyard or clip. |
| Self-Adhesive
(Double sided) |
Fast-paced workshops or short-term visitors. | No need for plastic holders; sticks directly to clothing or a "butterfly" fold. | Always double-sided; can occasionally peel or damage delicate fabrics. |
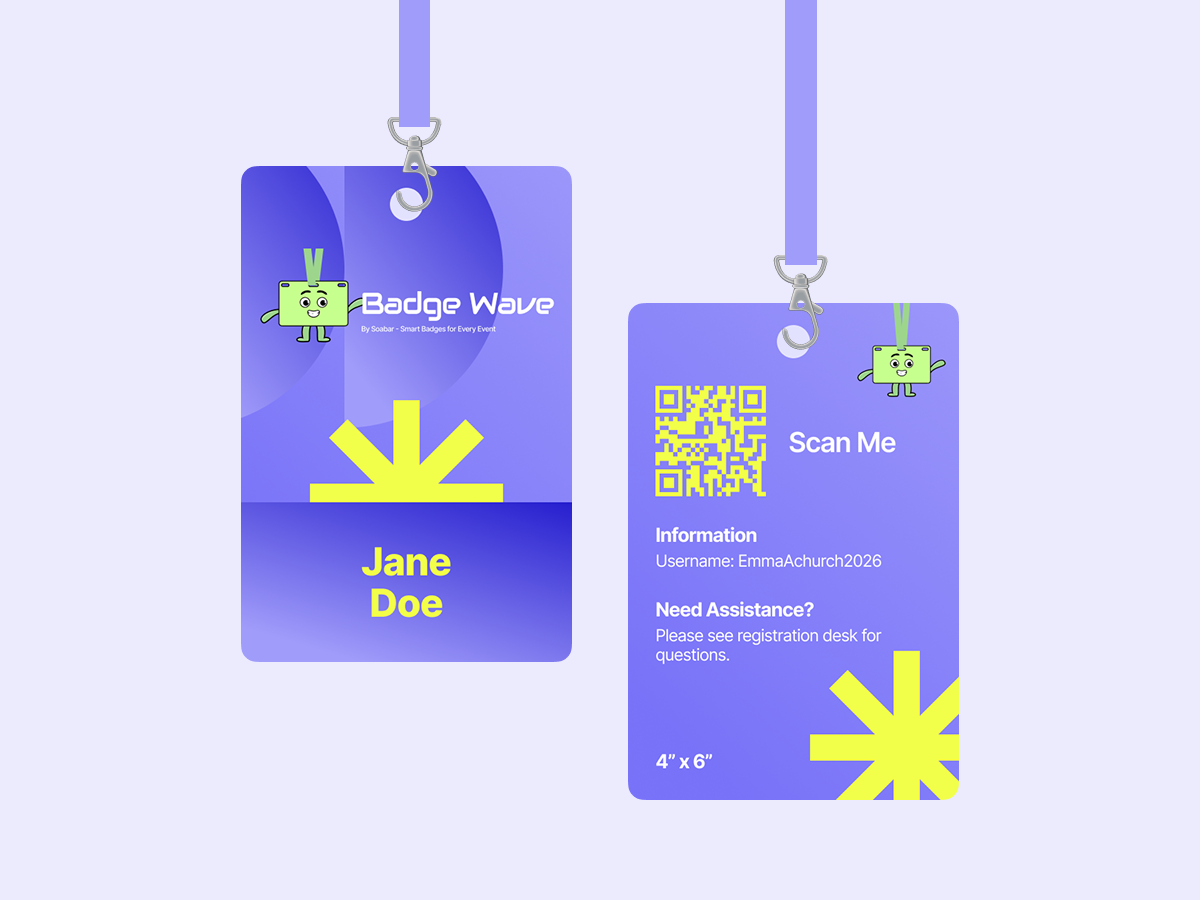
Size Matters: 4" x 3" or 4" x 6"?
Standard sizes exist for a reason—they fit most industry-standard accessories.
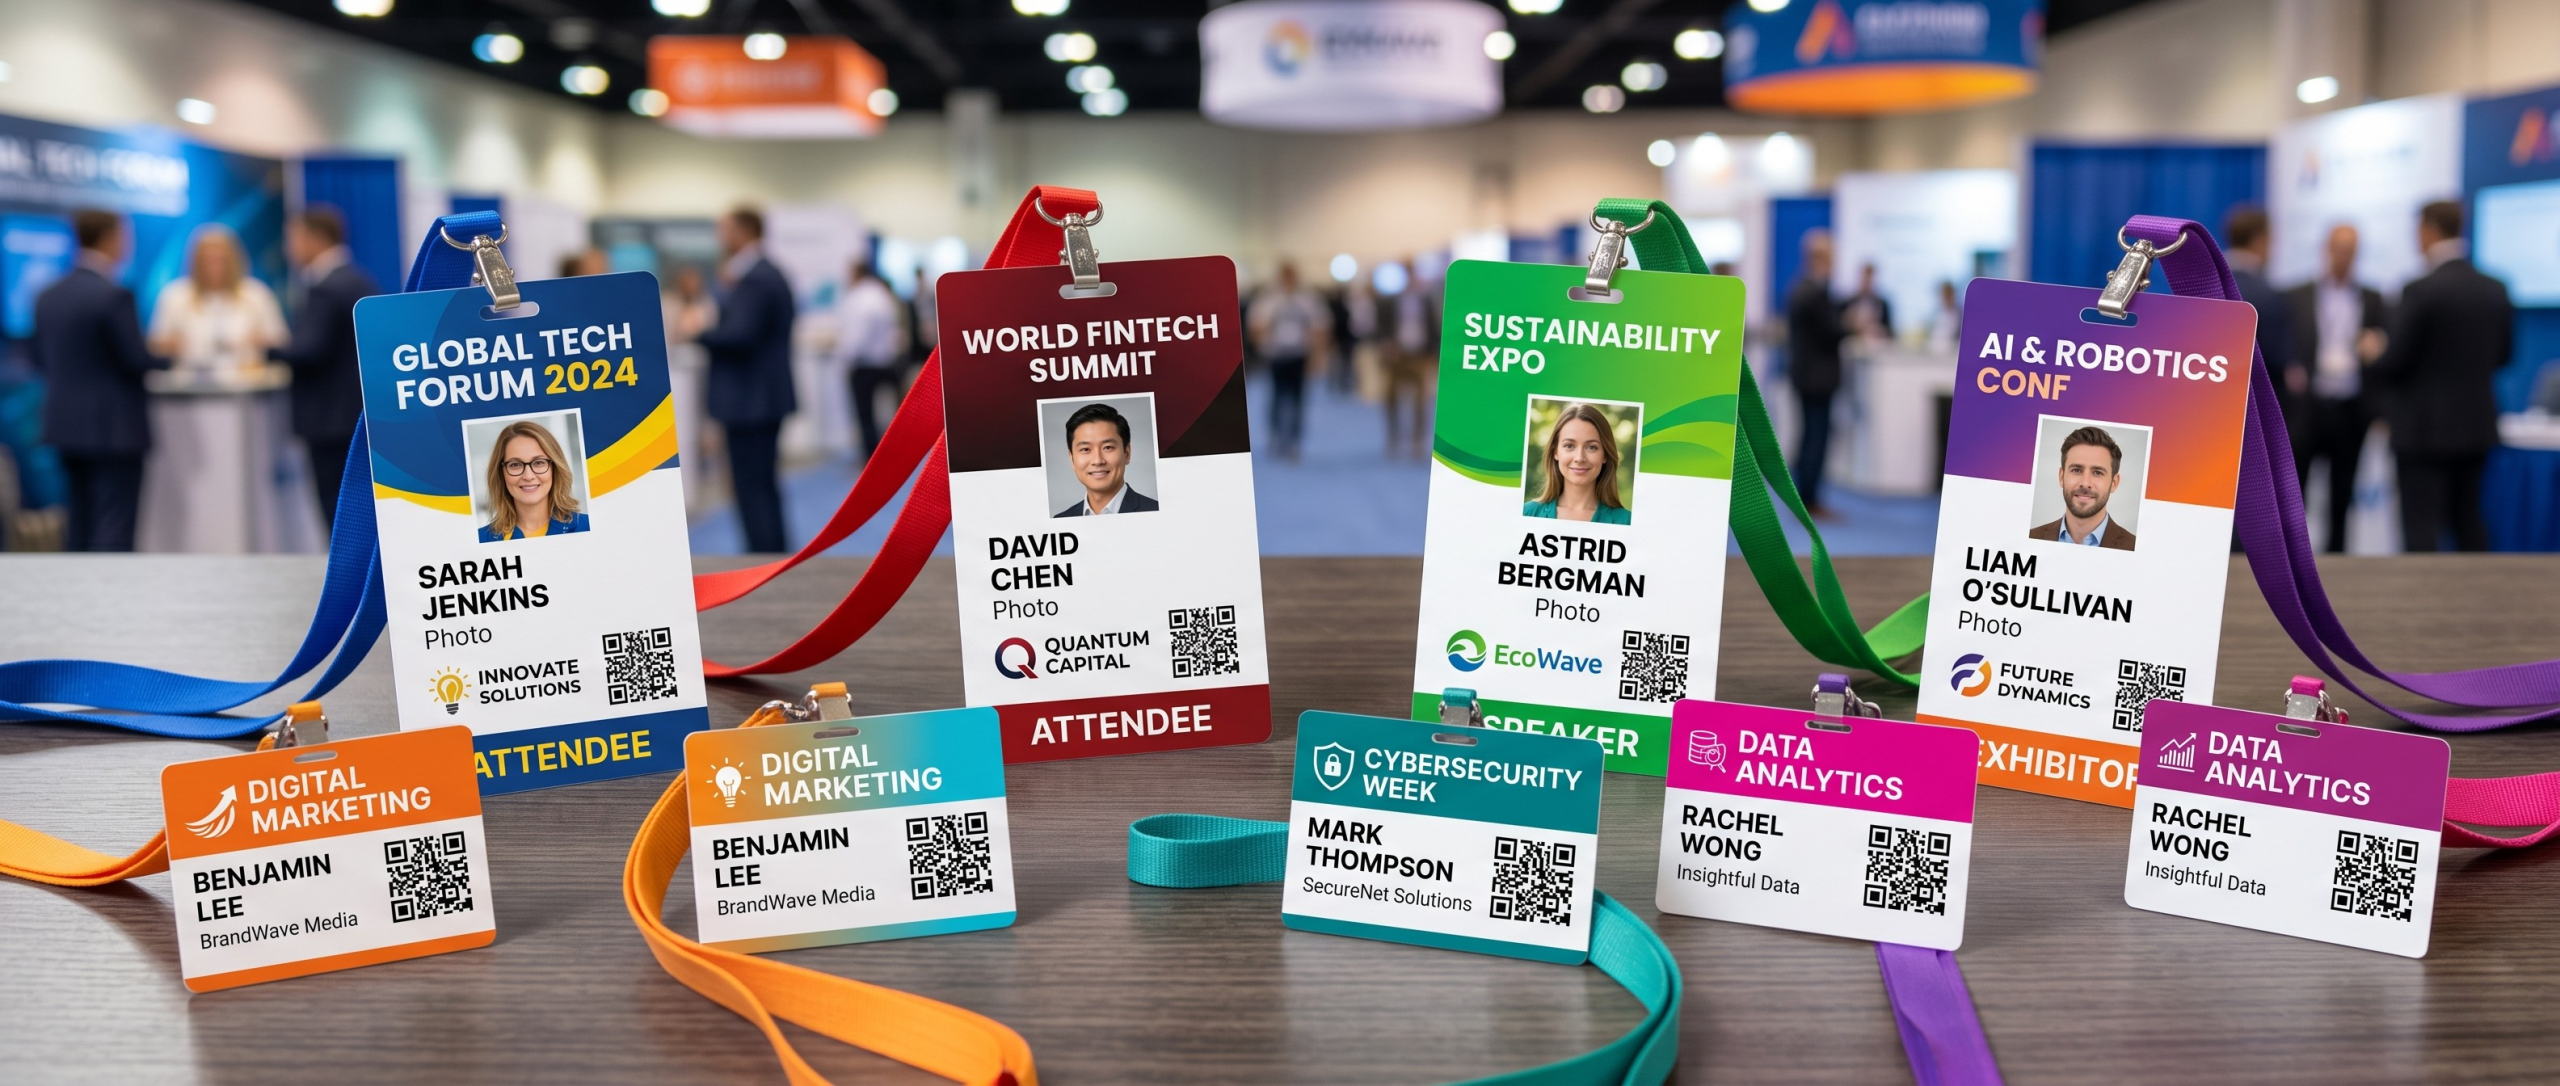
- 4" x 3" (Small): Best for simple networking events where you only need a name, company, and QR code. It’s lightweight and less "clunky" for the wearer.
- 4" x 6" (Large): The ‘Power Badge’. Use this when you have a lot of information to convey.
Surface Area Advantage: With a double-sided 4" x 6" badge, you have a massive amount of real estate. You can print the event agenda on the back, a floor plan, or additional sponsor logos. It also ensures that even from a distance, names are highly legible.
Slots, Holes, and Accessories
How your badge hangs on the wearer is just as important as how it looks. If a badge flips over and shows a blank back all day, you've lost 50% of your branding opportunities.
Slot Types
- Single Slot: A single, wide centred hole. Best for standard lanyards with a single "lobster" clip. This includes a Euro Slot design.
- Double Holes: Two small holes on either top corner. This is the best way to prevent badge flipping. When used with a double-clip lanyard, the badge stays facing forward at all times.
- Triple Slot: Dubbed as ‘The Hybrid’, this selection features a central slot or hole flanked by two smaller ones. This is the ultimate "future-proof" option, allowing you to use almost any lanyard type—single clip, double clip, or even a plastic pouch strap.
- No Holes: Perfect for those using adhesive badges or for card badges that will be placed inside a plastic badge holder that already has its own punch-outs. This keeps the badge design clean and unobstructed.
Accessories
- Lanyards: Available in plain, pre-printed, or bamboo/recycled materials for eco-conscious events. Let us know your requirements by contacting us either before or after placing your badge order.
- Badge Holders: If using thin card stock, a clear plastic pouch adds durability and protects the badge from spills or "wear and tear."
Don't Forget Lead Generation!
When designing your badge layout, ensure your QR code or Barcode has enough "quiet zone" (white space) around it. If you place a barcode too close to the edge or a dark graphic, scanners might struggle to read it, leading to frustrated exhibitors.
If you’d like to take the hassle out of your event completely, we can design your badge for you. Save time, hassle and money by trusting the experts who prioritise lead generation and an eye catching design, every time.
Ready to print badges for your event?
Whether you need the precision of our high-end, industrial presses for your base stock or advice on the best thermal printers for on-site use, we’re here to help you make your next exhibition or event a seamless success. Shop our printers and badges here, or contact us to speak directly to a friendly, knowledgeable badge printing expert.
- April 23, 2026
FAQS
Frequently Asked Questions
This will depend on what you want to print onto your badges on the day of your event. Our thermal tickets are designed to be printed on the Zebra range of printers, namely the ZD621 and GK420D. These printers will print your data and text in a single colour. Our Inkjet tickets are designed to be printed on the Epson C3500 and C4000 range of printers, which both allow for full-colour on the day printing.
Direct thermal technology uses a heat-sensitive coating to create clear, high-quality text or images from a single-colour printer, offering a simple and efficient printing solution without the need for ink or toner. Our Inkjet material is specially coated to allow a CMYK print process in full colour.
Typically, our on-site printers will accept any badge width up to a 4” wide. The most common size for an event badge is 4” x 12”, which folds to 4” x 6” double sided.
You can view our artwork requirements on the downloadable, editable templates on each product page.
Yes this is possible! We would just need a good understanding of your event, your branding guidelines, what is required to be printed on the badge and the logo(s) that you wish to feature. Email us at: BadgeWave@soabar.co.uk