





What Size Should Conference Badges Be?
Conference badge size should be decided from the information hierarchy and wearing conditions, not from a screen mock-up. Badge Wave states that its on-site printers typically accept media up to four inches wide and identifies a 4 × 12-inch piece folded to a 4 × 6-inch double-sided badge as a common event format. Smaller 4 × 3-inch finished options are also available. The correct choice depends on what must be visible at conversational distance, what can move to the reverse, and whether a code must scan while the badge is being worn.
Compare physical formats in the event badge range before finalising artwork. Product construction, printer compatibility and attachment options are as important as the finished dimensions.

Use 4 × 3 inches for concise identification
A 4 × 3-inch finished badge works well when the front needs a prominent name, organisation, role and compact QR or barcode. This is the central decision behind use 4 × 3 inches for concise identification, because it determines what the attendee sees and what the registration team must deliver under pressure. Define the required result before comparing products, then separate essential functions from preferences that can change. This prevents a visual choice from creating an operational conflict later.
Prioritise those fields and move agendas, Wi-Fi details or promotional copy elsewhere. Use realistic names, roles, records, artwork and equipment rather than a perfect demonstration sample. Print the longest names and companies at actual size and read them while the badge is worn. Document the approved result so every station starts from the same configuration.

Choose 4 × 6 inches when content has a job
The larger format is justified when extra space supports wayfinding, access recognition, a headshot, agenda, sponsor panel or multi-day information. The heading is practical rather than theoretical: the organiser needs a choice that works with the badge stock, data and event-day process. Consider the people, data and equipment involved at this exact stage. A decision is useful only when the team can apply it consistently during setup and live registration.
Assign each additional element a clear attendee or operational purpose instead of filling available space. Use realistic names, roles, records, artwork and equipment rather than a perfect demonstration sample. Ask staff to identify roles and scan codes without holding or rotating the badge unnaturally. Include exceptions as well as the normal attendee journey, because they usually expose the hidden delay or layout failure.
Plan the front and reverse together
A double-sided construction can keep identity on the front while placing schedules, Wi-Fi instructions or sponsor information on the reverse. Treat this as a specification question, since a visually attractive option can still fail if it does not work in the intended registration environment. The specification should state what success looks like and what would make the option unacceptable. That gives artwork, registration and venue teams the same decision rule.
Decide which side must remain visible if the badge turns on its lanyard and repeat critical identity cues when necessary. Use realistic names, roles, records, artwork and equipment rather than a perfect demonstration sample. Fold and assemble a production-equivalent sample to check alignment and orientation. If the result fails, change the specification before production rather than asking event staff to compensate manually.
Protect the name hierarchy
The attendee name is normally the first element another person needs to read, followed by organisation and role. The best set-up depends on the event requirement, but the relevant factors can be defined and tested before an order is approved. Resolve this point before dependent work is approved. Late changes can affect templates, stock allocation, staff instructions and the reliability of earlier testing.
Set minimum type sizes through physical testing and provide rules for long or missing fields. Use realistic names, roles, records, artwork and equipment rather than a perfect demonstration sample. Review a dataset containing the longest real values rather than a short sample name. Repeat this check whenever the relevant artwork, stock, data or equipment changes.
Reserve a proper code area
QR codes and barcodes need sufficient size, contrast and clear space around them, and folds or attachment holes can make a technically valid code unreliable. This is the central decision behind reserving a proper code area, because it determines what the attendee sees and what the registration team must deliver under pressure. Use the event's real attendee journey and priorities, not a generic best practice detached from the venue. A small meeting and a peak-arrival exhibition may need different answers.
Position the code on a flat area away from slots, edges and variable-data collisions. Use realistic names, roles, records, artwork and equipment rather than a perfect demonstration sample. Scan multiple samples using the actual app, device and normal indoor lighting. Use the outcome to set the staffing, stock or artwork rule for this event rather than relying on an assumed universal answer.
Match size to printer and stock construction
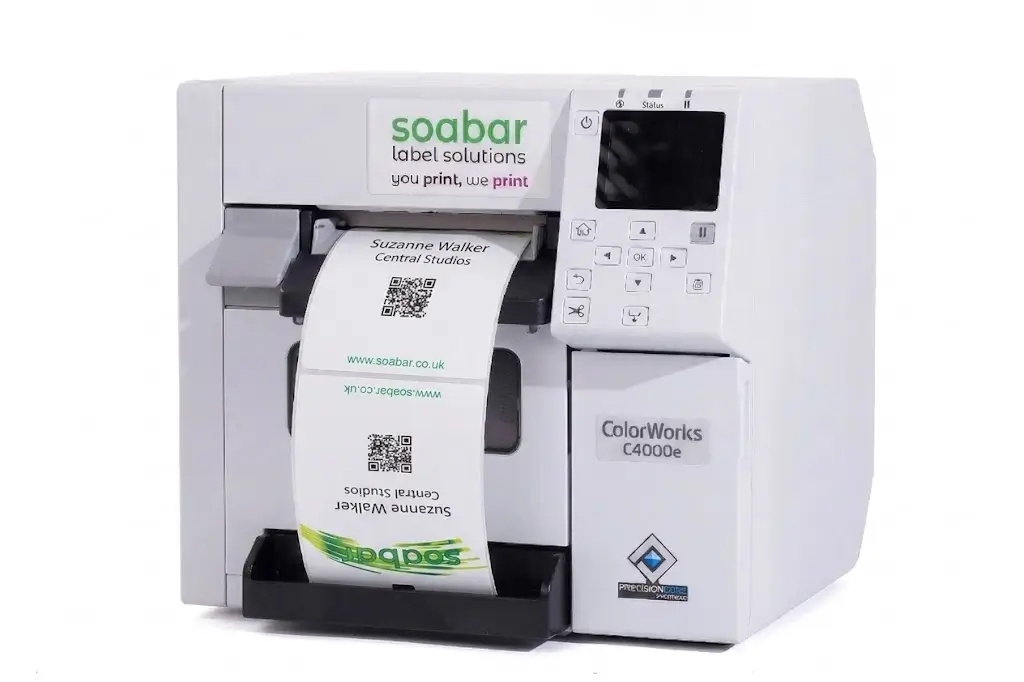
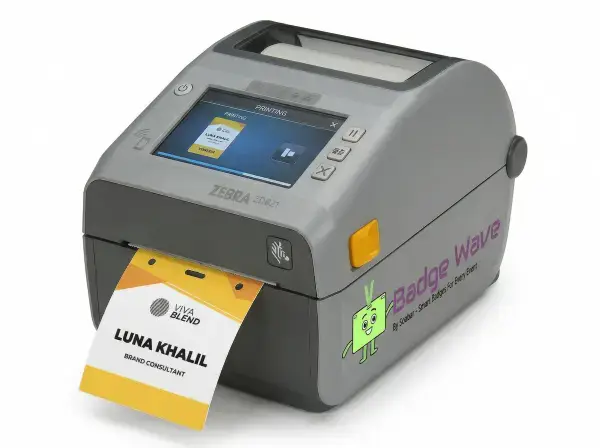
Finished size does not describe the full piece that travels through the printer; folded or adhesive badges may have a larger feed length. The heading is practical rather than theoretical: the organiser needs a choice that works with the badge stock, data and event-day process. Keep the choice proportionate to its purpose. Additional fields, colours, devices or process steps should remain only when they solve a defined attendee or operational need.
Confirm media width, length, sensor requirements and whether the stock is card or self-sealing adhesive. Use realistic names, roles, records, artwork and equipment rather than a perfect demonstration sample. Use the exact product template and printer model before approving the design. Keep a reference sample with the event kit so operators can distinguish correct output from a developing fault.
Test the attachment and wearing position
A badge can curl, flip or sit behind a jacket depending on its size, weight, holes, clips and lanyard length. Treat this as a specification question, since a visually attractive option can still fail if it does not work in the intended registration environment. Assign an owner for the decision and its acceptance check. Without ownership, teams may use different versions or make inconsistent corrections under pressure.
Assemble samples with the intended accessory and ask people of different heights to wear them. Use realistic names, roles, records, artwork and equipment rather than a perfect demonstration sample. Check readability, comfort, garment contact and code accessibility while walking and sitting. Record who approved the result and which version was tested to prevent an earlier draft returning at venue setup.
Reduce size only when readability survives
A smaller badge can reduce material and visual bulk, but it is a poor choice if staff cannot recognise categories or attendees cannot read names. The best answer depends on the event requirement, but the relevant factors can be defined and tested before an order is approved. Include the fallback in the design rather than adding it after a failure. The alternative must preserve essential identity, access and registration functions.
Remove non-essential content before reducing type or compressing the layout. Use realistic names, roles, records, artwork and equipment rather than a perfect demonstration sample. Approve the smallest format that passes the physical readability and scanning test. Run the fallback immediately after the main test and confirm that it preserves the essential function.
Conference badge sizing checklist
Identify the information required on the front.
Move secondary content to the reverse or event app.
Test both 4 × 3-inch and 4 × 6-inch options where appropriate.
Use the longest attendee names and company values.
Keep codes clear of folds, holes and edges.
Confirm full stock dimensions and printer compatibility.
Assemble the real lanyard, clip or holder.
Approve the physical proof, not only a PDF.
What to record in the approved event brief
The final brief for conference badge size should state the decision reached under use 4 × 3 inches for concise identification, the operational rule agreed for choose 4 × 6 inches when content has a job, and the acceptance check used for plan the front and reverse together. It should also identify the owner of protect the name hierarchy, the production or configuration version that passed testing, and the date after which changes require another approval. Include the relevant event date, in-hand date, expected attendance, peak arrival pattern, badge size and construction, printer model, stock reference, software or data source, attachment and delivery location. Record the edge cases used in testing, who may edit attendee records or authorise reprints, and the fallback that applies if the normal route is unavailable. This written brief gives design, registration, venue and supplier teams one source of truth. It also prevents a late request from quietly changing an assumption that earlier artwork, capacity or scanning tests depended on. After the event, compare the approved brief with actual queue, reprint, stock and support results so the next specification improves from evidence rather than memory.
Yes, when the badge needs concise identification and a compact code. Test long names and the intended attachment before approving it.
Badge Wave states that its on-site printers typically accept badge media up to four inches wide. Confirm the exact stock and model.
Yes. The complete unfolded template must account for fold direction, front and reverse orientation, variable fields and attachment points.
Usually, a consistent size simplifies production and wearing. Differentiate categories through clear text and controlled design unless size itself has an operational purpose.
It provides more space for a headshot, access cues, agenda, sponsorship or readable multi-line information without shrinking essential text.