
The Ultimate Event Badge Checklist: Everything You Need Before Doors Open
Whether you’re hosting a 50-person seminar or a 5,000-delegate summit, at Badge Wave we understand that your event badges are more than just a piece of card or plastic. They’re a networking tool, a security pass, and your guest’s first physical interaction with your event and brand.
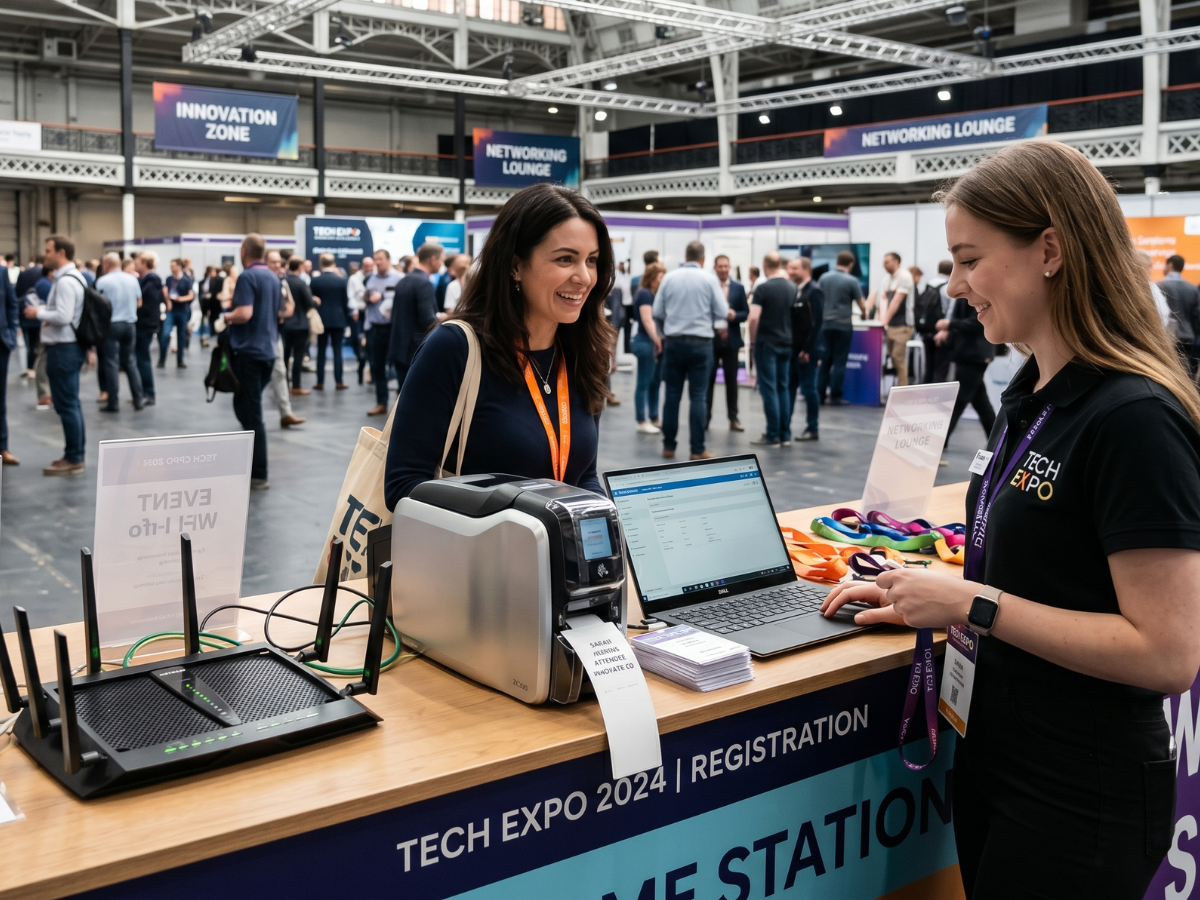
If you’ve been to an exhibition on opening day, then you’ll have seen it- the frantic scramble at the registration desk because a printer jammed or a lanyard went missing. To ensure your check-in is smooth and gives a great first impression, here is the ultimate "Must-Do" checklist for event organisers before the doors swing open.
1. Design your badge for the "Three-Foot Glance"
An exhibition badge should be readable from three feet away. If your guests are squinting to see a name, then you’ve failed the networking test.
- Bold Typography: Print first names in a large, heavy-weight font. It sounds simple, but it’s the difference between an effortless "Hello, Sarah!" and an awkward "Sorry, what was your name?"
- QR Codes are King: Place a high-contrast QR code on the front. This allows for seamless entry scanning and "lead retrieval" (where exhibitors can scan guests to exchange digital business cards).
- Colour Coding: Use colour bars at the bottom to distinguish between Attendees, Speakers, Press, and Staff. This helps your team to manage traffic effortlessly.
2. Infrastructure: Power and Connectivity
Technology is your best friend until the Wi-Fi drops. Then without these things, you'll likely go into full-on panic mode!
- Dedicated Wi-Fi: Never rely on the venue’s "Guest WiFi" for your check-in desks. Ensure your registration team has a dedicated, password-protected SSID or, better yet, a hardwired Ethernet connection.
- Offline Mode: Ensure your badge printing software has an "Offline Mode." If the internet hiccups, you should still be able to print and sync the data later.
- Power Management: Tape down your cables! A guest tripping over a power lead is a quick way to shut down a registration lane.
3. The Hardware Survival Kit
If it can run out, it will run out at 8:55 AM.
The Backup Checklist:
| Item | Requirement |
| Printer Ink/Ribbons | Bring double what you think you need. Thermal printers don't use ink, but they do need cleaning pens! |
| Cleaning Kits | Dust is the enemy of thermal print heads. A quick swipe with a cleaning card can fix "streaky" badges. |
| Spare Printers | Always have at least one "Hot Spare" printer pre-configured and ready to swap in. |
| Laptop Chargers | It’s easy to forget the basics. Label yours so they don't get mixed up with the venue's kit. |
4. Stock Quantities: The "Buffer" Rule
The golden rule of event planning? Over-order everything.
- The 20% Rule: Order at least 20% more lanyards and badge holders than your registered attendee list. People lose them, they break, or you’ll get a surge of "walk-ins" on day one.
- Lanyard Tangels: Pro-tip—unbag and hang your lanyards the night before. No one wants to wait while a staff member untangles a "lanyard-octopus" during the morning rush.
5. Data Privacy: Keeping it Legal
In the age of GDPR and strict data laws, how you handle badges matters.
- The "Shred" Box: Have a secure bin behind the desk for "misprints." Never just throw a badge with a full name and company into a standard bin.
- Screen Privacy: Ensure your registration laptops are angled so that waiting guests can’t see the personal details of the person currently checking in.
- Consent: If your QR codes allow exhibitors to scan for data, ensure your "Terms and Conditions" (and a sign at the desk) clearly state that scanning a badge is the equivalent of handing over a business card.

The Night Before Pro Tip
Print a "Test Batch" of 10 badges using the actual venue WiFi and power. Check the alignment, the darkness of the print, and the scan-ability of the QR codes. If it works at 10 PM, you’ll sleep much better.
One Final Check?
[ ] WiFi is stable and private.
[ ] Bold names and QR codes are legible.
[ ] Extra lanyards are untangled and ready.
[ ] Spare ink and cleaning kits are on-site.
[ ] Secure bin for misprints is under the desk.
Ready to get your badges sorted for your next big date? Check out our range of durable, eco-friendly materials that can survive even the longest multi-day exhibitions!
- May 12, 2026
FAQS
Frequently Asked Questions
This will depend on what you want to print onto your badges on the day of your event. Our thermal tickets are designed to be printed on the Zebra range of printers, namely the ZD621 and GK420D. These printers will print your data and text in a single colour. Our Inkjet tickets are designed to be printed on the Epson C3500 and C4000 range of printers, which both allow for full-colour on the day printing.
Direct thermal technology uses a heat-sensitive coating to create clear, high-quality text or images from a single-colour printer, offering a simple and efficient printing solution without the need for ink or toner. Our Inkjet material is specially coated to allow a CMYK print process in full colour.
Typically, our on-site printers will accept any badge width up to a 4” wide. The most common size for an event badge is 4” x 12”, which folds to 4” x 6” double sided.
You can view our artwork requirements on the downloadable, editable templates on each product page.
Yes this is possible! We would just need a good understanding of your event, your branding guidelines, what is required to be printed on the badge and the logo(s) that you wish to feature. Email us at: BadgeWave@soabar.co.uk